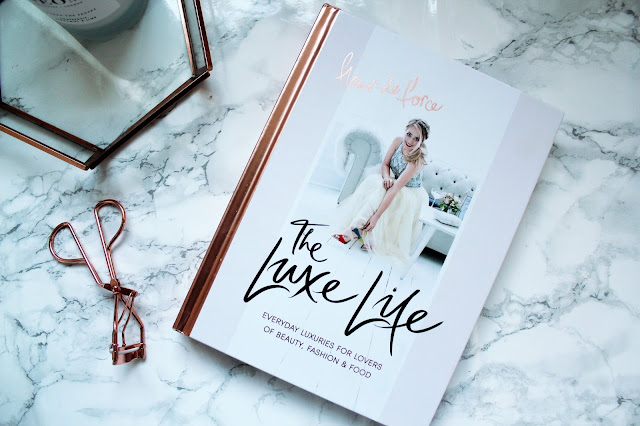
This isn’t a post to tell you exactly how to take your flat
lay photos (as everybody’s photography style is different) but it’s a post to
share some tips and tricks with you that I’ve learnt along the way.
I don’t have the money to buy the latest Cannon camera or IPhone
so I’ve always ‘made do’ in that sense for blogging photography. Yes my quality
of photos could be improved but I think I am doing a good job with the
equipment I do have.
Find a background
I didn’t realise the importance of a background with my
blogging photos until about a year ago. I picked my marble background up on EBay
but you can also find marble contact paper at B&Q. I use this for 90% of my
photos, which you’ll see, on my blog. I think it’s such a versatile background
and it works so well when you post your photos on social media.
If you can’t find yourself a marble background, I like to
use magazines and I always make sure I pick up a couple of magazines a month
including my favourite Hello Fashion Monthly and this months issue is a HFM Fashion Special. You can subscribe to the magazine here (which I am) and it's super cheap too so your magazine fix won't break the bank.
I have found that by using props in my blog photos, it
really gives my photos a more personal edge, especially when I’m taking
pictures of beauty products. Sometimes I think that flat lay photos can look
very ‘samey’ but I try my best to experiment with the props that I use. You don’t
need to go out and buy loads of products/props a lot of the things I use you’ll
already have in your bedroom. The following photos will have links to some of the products I use for blogging props.
Artificial Plant - New Look
I also use eye shadow palettes in my photos, lipsticks even
powders (if they have pretty packaging!)
Try out different
compositions
I think trying to get
a perfect ‘flat lay’ first time is pretty much impossible. I probably take
10-15 photos of the flat lay before I edit the photo I like the most. Don’t be
afraid to experiment with angles, use the rule of thirds and just have fun with
creating beautiful photography. Another tip is I use my phone for photos on
Instagram as by the time I transfer them from my camera they’re too pixelated
(or don’t look very clear) to post on Instagram. Speaking of Instagram you can
follow me on Instagram here (cheeky self promotion!)
Edit your photos
I’m disappointed in a
way that Instagram has become all about filters, achieving the perfect ‘theme’
and making sure every photo fits into your Instagram photo grid in the most
aesthetically pleasing way (but I can’t help but be a little sucked in to the
trend.) When I edit my photos on my phone for social media I use a mixture of
Photoshop Express, VSCO, Facetune and Faded.
Make the most of natural lighting
When you don’t have
the budget for light boxes, fancy lighting etc you have to make the most of
natural light. I try and take my photos next to window or somewhere in the
house where there is the most light. I find that natural light really helps the
quality of my photos and when there’s good lighting I literally take about 8
different sets of photos for blog posts!
I hope this post has inspired you and that you want to step outside the box a little bit with your own blog photography!


2 comments
This post is so helpful - thank you! Sometimes it's hard to find the right props to put in your photos. Then when I do find the perfect props, I get bored and try to find new things haha x
♡ itsjessiejane ♡
I definitely need to get my flatlay game up!!! This is a helpful post. Xx
www.tashpantz.com
Post a Comment